Sunday, August 25, 2013

Class Preview for New Students


It's that time of year again where kids and teachers (and parents) are getting ready for school to start.  Each year, I make a little preview video so that my students can 'see' what our classroom is going to look like and send it out to them before school starts.  I have had great feedback from my parents thanking me for these videos and some have said that it really helped their child feel less anxiety about starting a new year.

I just take pictures (and a few videos) of things in my classroom and put it to a song in iMovie.  HERE  is my video from this year:


If you've been a reader of this blog you'll see many of my creations in the video. ;-)

Friday, June 28, 2013

Radical Rekenreks!


So at a recent math workshop, I learned about a Rekenrek (which is basically an abacus with two colors).  It really helps build number sense which is great since we are getting away from rote math problems and focusing on the understanding of math and how numbers work.  It is genius to me and so I went about making a class set.  As I was making them, my own kids started working with them and I loved listening to them talk through problems.  They had so much fun with them they each requested I make one for them in their favorite color (which of course I did).  To see a quick YouTube video of a teacher describing how to use them click HERE.


To make my Rekenreks, I used foam board (don't worry... there were all colors, not just the pink), string, beads (pony beads) a hole punch and scissors.  My hole punch is small and fits the string nicely.  I had it from my old scrapbooking days.


Punch four holes like this.


Then string the beads making sure you keep five of each color on either side.


I tied them different ways but this was the best (and fastest).


Snip the excess!


My kindergartner played with his (he wanted yellow) forever!  I couldn't believe the way he was manipulating it after just minutes.  I put a quick video of his review of how to use the Rekenrek that you can see too by clicking HERE or looking below.  My bigger kids (going into 3rd and 4th) also really liked them.  I made them Rekenreks that went to 30.

I also plan to make a more sturdy one for me on the harder foam board and bigger beads.

Summer Writer's Notebooks


I LOVE teaching writing and my students LOVE to write.  In the beginning of the school year, I have them make Writer's Notebooks by jazzing up a composition notebook. The directions are to cover it with pictures of people and things they love.  Because they are first graders and also learning to spell, I have them (or a parent) write the correct spelling of items/people next to the pictures for them to reference should they need to. They then wrap it in clear contact paper and we use it to write all year.

As I mentioned, my students love Writer's Workshop and even asked for it on days when we were on Field Trips or having Field Day (those are always proud teacher days).  With most notebooks filling up by June, I have found a Summer's Writer's Notebook to be the perfect end-of-year gift.  It's also personal because it has pictures to remind them of their first grade year.

To do this, in Publisher, I created a front and back for a Writer's Notebook.  I used class pictures (of them, anchor charts, etc) from throughout the year and typed their name on the front.  I also included a picture of them on the front and on the back pictures of them with their family members (who came in throughout the year as Mystery Readers).  This may sound like a lot of work, but it's not.  I keep a classroom blog (surprised?) and so I copy pictures from there.  The only pictures that are different on the notebooks are those of the student and their family member.  I can get this all done in about an hour.

Next I wrap them.

So... All you need for this project is the front and back pages you make (in publisher, pages... or some other program), composition books, scissors, scotch tape and clear contact paper.  Here is how I wrap my books (and once you get going you can easily kick these out too).


Use a small piece of rolled scotch tape under the page you made to keep it in place on your writer's notebooks.  Make it small because you don't need much.  I have used glue in the past which sometimes shows through, so I prefer tape.


Cut the contact paper so that it can cover your book.
Next peal off the backing and set the notebook as I have shown above (I kept the backing on so you could see how big I make it).


Then pull one side over to the other and pull it taut and smooth it out so you don't have bubbles.  If you do, don't worry!  The contact paper is easy to remove and very forgiving.


Next I cut the corners like this (to make it easier to fold and less bulk inside).


I also cut a small slit at the top and bottom near the binding.


Then I just fold all the sides down like a present.

And there you have it!  As a bonus, I tell my students if they come back in the fall with some great writing in their notebooks, I'll have a small treat waiting for them (a sucker and a new pencil).


I should mention with my own kiddos seeing these (and wanting one), they now have their own summer notebooks to write in too...
Great way to avoid the summer slump!
Write On!

Wednesday, June 5, 2013

Regrowing Romaine? Who knew?


So it's been a while since I've posted to this blog (and I imagine I will post a lot more once school, dance, T-ball, baseball and dance are over)... BUT...
Did you know this?
Romaine lettuce will regrow itself!
I saw it on a friend's facebook page and being a mother of a son who has a Russian Tortoise who will live forever (OK, only 70 years or so) and eats this stuff (and dandelions) I had to check it out!
The teacher mug on the left shows how the other two were original cut (straight).  The other two are after one week of growth!  How cool is this???  

And how cool is it that I have a pet that lives off lettuce and weeds!  Gotta love that!


Sunday, March 17, 2013

St. Patrick's Day fun (for school and home)


Anyone who teaches elementary school knows how mischievous Leprechauns can be and so in my class the children LOVE being creative and thinking about how THEY could catch a Leprechaun. It's always fun to read their ideas.  This year we also made leprechauns using their orange hand prints for beards.  Usually I come back to school and see a mess in my classroom and some green water in the sink.  Who knows what I'll find in Room 119 this year...


I get my kids thinking about leprechaun traps by sharing a video of a leprechaun trap my son made last year.  My students were captivated and I can't wait to hear if they set their own traps this year.  As for my son, he made another trap but again the Leprechaun got away... Here are some pictures of what he did!
This is my son's trap, complete with gold coin (really it's a quarter) and a trap door that you can't really see from this angle.  A friend thought this was perfect since Leprechauns love Amazon

There were trails of shamrocks all around our house.


Thankfully for the Leprechaun, my kids always have dirty clothes that they use to mess up their rooms!

Found on Joey's Trap

Left on my son Joey's trap was the above letter.  If you can't read it, it says:

You almost had me with that trap door
but alas, I broke free now there's trouble in store!
I messed up your rooms and I took your gold
but if you're clever, there's treasure to behold.

If you're smart and really think, boy
you can solve my riddles, you'll find some joy.
But to find my treasure, you'll need some friends.
So grab Ali, Zach and Sean, they'll help you get to the end.

Solve my clues, one by one
And you'll be happy when you're done!

Clue #1: I stopped in the bathroom look up and underneath
While I was there, I brushed my teeth...

Found in the kids' toothbrush drawer in the bathroom.

Clue #2: This isn't the only bathroom I was in, 
go downstairs and lift the lid!


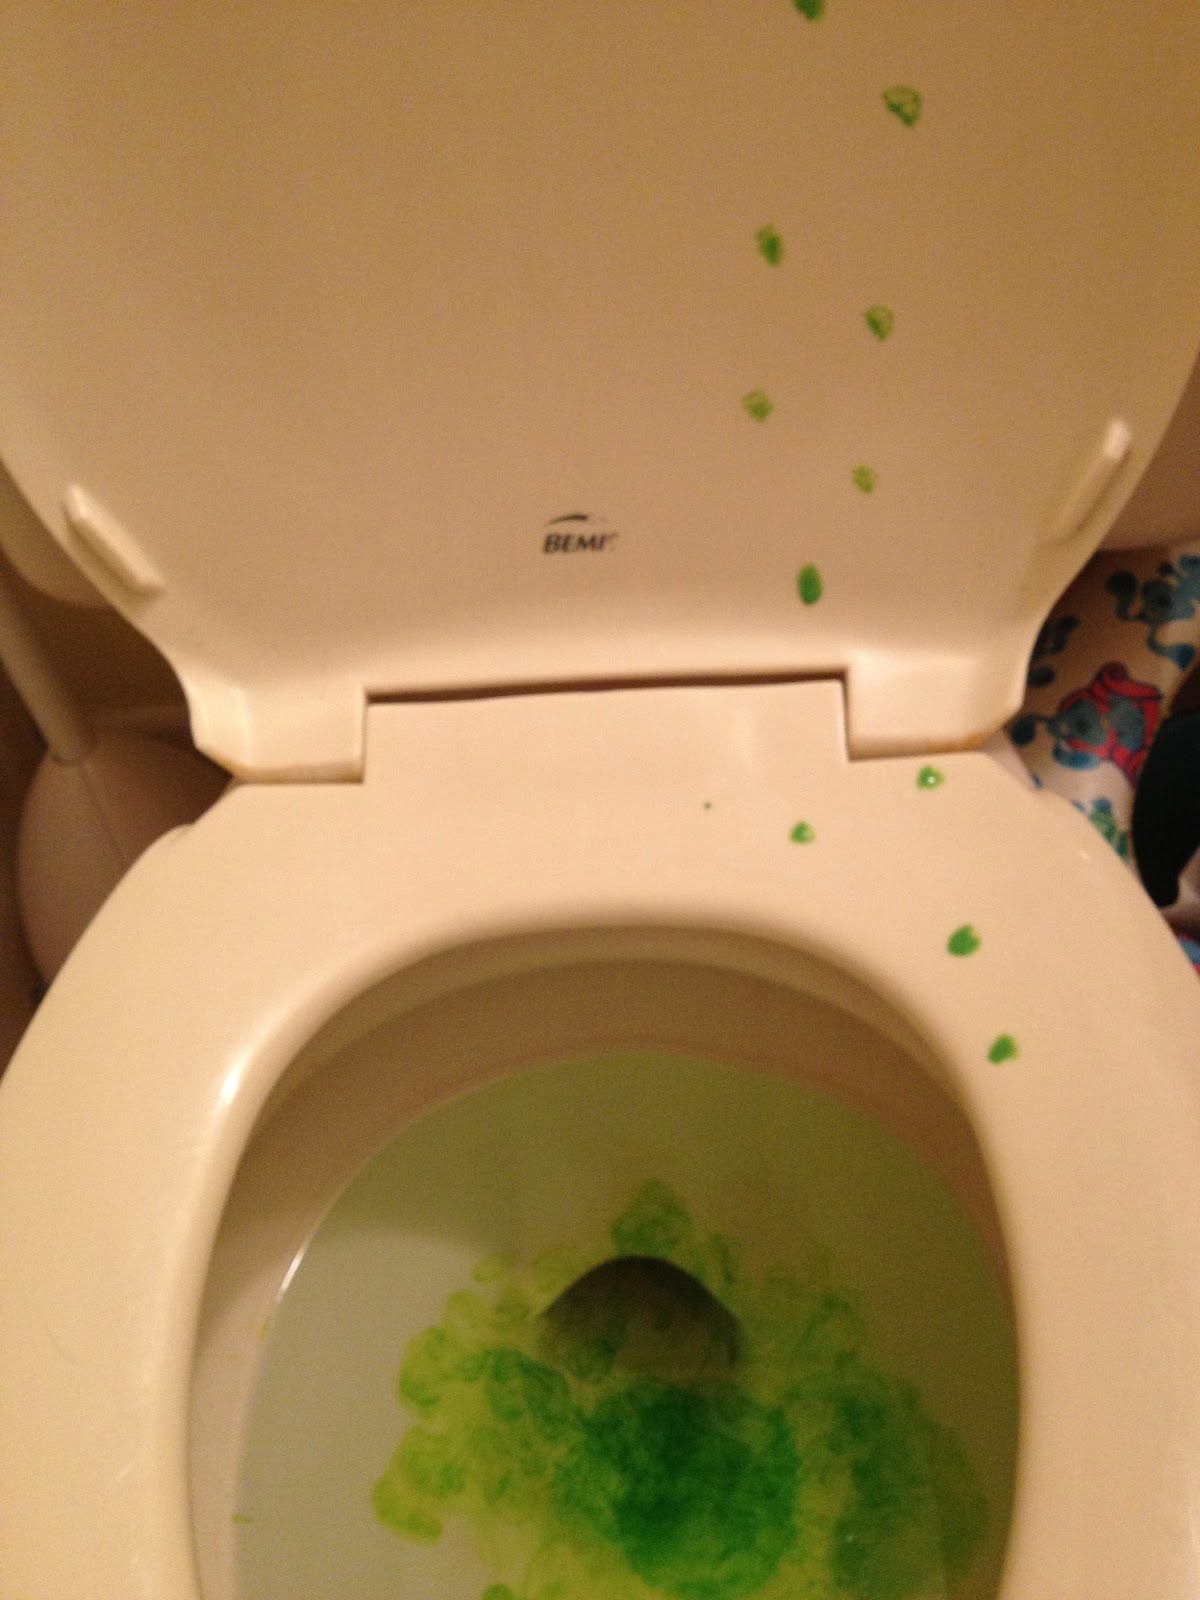
This was taped (with green messages and footprints) to the under seat lid of the toilet downstairs.
Clue #3: You're doing well, don't waste more time.
Go to the clock that makes a chime.

On the grandfather clock...
Clue #4: All this work, my thirst was out of sight.
So I went to your fridge and drank something that was white.


Milk turned GREEN!
Clue #5: So I decided to turn your milk green!
Go find some cushions! Look in between!

Under some couch cushions
Clue #6: It's almost time to end this rhyme biz.
Go find where Sean's lunch box is.
Look inside and don't be shy.
In there is some treasure for you to divide!

In Sean's lunch box!
YOU FOUND IT!
I knew you could find it! I'm proud of you.
Today you wear green instead of blue.
I'll see you next year, what more can I say?
I wish you all a Happy St. Patrick's Day!

Happy St. Patrick's Day!
~L

Thursday, March 14, 2013

Grouping Cards (FREE) for Your Classroom!


 This is an idea I got from one of my (many) classes that I take in the summer (even though us teachers do NOTHING in the summer...).  We were talking about different ways to make groups and sometimes it's nice to make random partnerships and do it in a fun way (which is what this activity is). You can use this for turn and talk buddies, reviewing or really for anything...
I have made cards (that you can get by clicking HERE) that the kids love. Just cut them out (and I laminate them so they stay nice).  Each child gets one card.  They look at their own card and then when I give the word, they show their card WITHOUT TALKING (brilliant, I know...) until they find the card (or cards) that matches their card.  Once they find their partner they sit next to each other at my "gathering place" quietly so I know they are ready.  The kids love it. I love it. It only takes a moment and it gets us moving.  I have made my cards based on the seasons/holidays (and I also made some for insects since we study those too).  If I ever teach upper-ele again, I might use synonyms on cards or other fun pairings that would interest the students.
I keep my cards in a simple pencil box.  After my students find their partner, and sit down (at the gathering place), I have them share a quick idea or thought with their buddy while I pass the box along to collect the cards.  It's been a great success in my room so I just thought I'd share!
Enjoy!
~L

Saturday, March 9, 2013

Keeping Floors in MINT Condition


For Valentine's Day, my husband told me that I was still in "Mint" condition and gave me a floor cleaner called "The Mint."  I had never heard of it but since our tradition has been candy in the past with funny puns, this was a pretty cool gift (that I learned wasn't as cheap as the candy I got him!).  What it is, is a robot that sweeps/ mops your floors BY ITSELF using GPS.  I place this cube on my counter, set the Mint on the floor, choose mop or sweep and then off he goes!  When he's all done he sings a few notes and returns to the place he started.
 Now we have two dogs who LOVE to shed and four young (messy) kids at home, so cleaning the floor regularly is something we need to do (regularly as in every day or every other).  This can be hard being full time workers with busy kids but it is necessary... especially on the hardwood where all the dog hair seems to pile together and form a third animal (sigh).
The Mint can actually navigate under and around chairs and stools, but once or twice a week, I get them off the floor to make it easier.  I used to put them into our family room but then realized that it's better to just flip them upside down and then wipe down the legs of the chairs (which sometimes have splatter of milk or other spills from my youngest).  I have no idea what took me so long to figure THAT out.  It's much faster to flip up the stools and chairs than drag all twelve into another room (which is what I used to do).  I am a slow learner sometimes...
 I actually wipe down the stool and chair legs while the Mint is working so it's like I'm doing two things at once.  We have a pretty large kitchen and if we leave our walk-in pantry door open, he'll go in there too!  Our family room drops down a step from our kitchen and somehow the Mint knows where to stop.  My only gripe is that sometimes he goes onto the carpet in our dining room or living room and gets stuck, so we have learned to put something down to stop him.
Overall he's saved us A LOT of time and keeps my floors looking good.  He came with two blue mop cloths (that you dampen and an attachment that you can add water to) and two white sweeper mop cloths.  I guess you can use Swiffer stuff with him, but I prefer reusing these since it's better for the environment (and of course, cheaper).  I still love my Shark Mop to clean up spills or if I want to work quickly to get the floor done before people come over or something.    It takes him an hour or so to do our kitchen when he mops... he's quicker when he sweeps.
So my husband did well... he saved me from eating more candy and freed up more time.  Now I just need to find the robot who dusts, vacuums, cleans bathrooms, picks up toys and does laundry... a girl can dream!

You can read more about this little guy on Amazon by clicking HERE.  You may be able to find him cheaper at other stores that carry him.  My hubby got him for half off!